


Venison Manicotti: A Meal No One Forgets
Full Recipe.


Manicotti Politics
Believe it or not, Manicotti is a contentious - controversial subject. If you pull up to the wrong hood (another chef’s kitchen) with your favourite recipe; prepare to take cover. You’ll notice an incoming knife on a collision course with your face.
The Debate: Is it made with pasta sheets or crepes? The answer depends on who you ask.
Back in 2008, I had the great opportunity to work for one of Canada’s greatest chefs in one of Canada’s best restaurants. Chef Giuseppe Di Gennaro of Capo.

This man and I had a very dynamic relationship, I had such a huge amount of respect for him and I learned so much from him at this point in my career - but he was a wild man back then, he had his standards and nobody was going to make him compromise them.
Chef Giuseppe had a beautiful dish on the menu, one that sticks to me this day: Dungeness Crab Manicotti with Tarragon Cream and Pepperonata. It was beautiful. Magical.
This manicotti was made with a crepe - NOT Pasta sheets. That dish ended the debate in my mind forever.
CREPES. Final answer.
And thus, my own recipe. Hearty Venison Bolognese, Tightly swaddled in Crepes, Submerged in Rich Béchamel sauce, cooked to crispy, creamy perfection.
Enjoy!


Ingredients:
2 lbs ground venison
100 grams pancetta
6 garlic cloves, minced
1 onion, small dice
2 carrots, small dice
4 celery ribs, small dice
3 bay leaves
4 tbsp butter
4 tbsp tomato paste
1 cup of white wine
1.5 cups milk
bechamel (see recipe in part 4)
Salt and pepper
STEP 1: Heat the Dutch oven -
“Paving the Road.”
Place your Dutch Oven on the stovetop and set the heat to medium.
Add butter and let it melt completely.
Notes:
A Dutch oven's heavy base helps evenly distribute heat, making it ideal for slow cooking over a long period of time. You do not want your dutch oven to get smoking hot, otherwise it could burn the butter.
Butter should foam as it melts, signalling that it's hot enough to begin cooking without burning. Avoid browning or burning at this stage as it could add an “off” or bitter flavour note in the end result.
STEP 2: Sweat the Aromatics -
“Building Blocks.”
Dice vegetables (e.g., onion, carrot, celery) and pancetta into small, even pieces.
Add all vegetables, bay leafs, and pancetta to the melted butter.
Season with an even sprinkle of salt and pepper.
Cook over medium heat until vegetables are soft, translucent, and fragrant.
Notes:
Evenly sized pieces ensure consistent cooking texture and flavour distribution - I call this flavour/texture continuity.
Adding salt early helps draw out moisture, aiding the sweating process. The sweating process helps with the breaking down of sugars and amino acids, which eventually leads to caramelization, although we do not want to caramelize these aromatics too far as their flavours would become too concentrated and overpowering. Adding salt early also helps develop these flavours throughout the cooking process which also becomes much easier to adjust the seasoning to a perfect amount in the finishing stages of the recipe. Always season along the way!
STEP 3: Add the Venison -
“The Flavour Matrix.”
Add ground venison to the Dutch oven and break the meat down into small pieces using a wooden spoon or spatula.
Season again with salt and pepper.
Cook until the venison is lightly browned.
Notes:
You want to ensure that the meat is broken into small pieces for a bolognese, this gives the consistency of the sauce a smooth and rich feel. It is fairly unpleasant to bite or chew on larger chunks of meat in this recipe, trust me!
For the same reason as the aromatics (vegetables), you want to avoid over-browning the meat. Lightly browned is great, it will give a slightly richer and more developed flavour but if you take it too far it will become too rich and overpowering in the final result.

STEP 4: Cook Out the Tomato Paste & White Wine -
“Now We Are Getting Somewhere.”
Stir in tomato paste to evenly cover all the meat and aromatics.
Cook for 2-3 minutes until the tomato paste slightly darkens.
Deglaze your Dutch oven with the white wine, loosen any browned bits on the bottom, and let simmer until the aroma of the alcohol cooks off.
Notes:
It's very important to not burn the tomato paste at this point of the process, burning the paste will result in a very bitter taste. The purpose of cooking the paste at this point is to cook out the raw taste and to develop the sweetness of it!
Once you add in the wine, occasionally stir to prevent anything from sticking to the bottom of the Dutch oven. The wine will reduce in volume a bit during this time, which results in the alcohol cooking out but the flavour of the wine staying behind.
STEP 5: Evaporate the Milk -
“There’s Nothing Wrong With Things Taking Time.”
Add 1/4 cup of milk to the mixture.
Lower the heat to low to maintain a very gentle simmer
Stir occasionally and cook until the milk has nearly evaporated before adding the next ¼ cup of milk, repeating this process until all the milk has been added and evaporated.
Notes:
The most important part of this process is - to take your time. Just enjoy the process for what it is, it will pay off! The slow simmering breaks down the meat into tender pieces of pure joy and melds all the flavours into a stunningly beautiful and rich sauce that will make you so proud of what you achieved.
STEP 6: Adjust the Consistency and Seasoning -
“The Finishing Touches.”
Add ½ of the béchamel sauce to your bolognese.
Stir well to make sure the béchamel is evenly incorporated.
Taste and adjust seasoning with salt and pepper as needed.
Cool down at least to room temp before assembling your manicotti.
NOTES:
You’ve made it, you have endured the long strenuous process on the road to perfection. Just one final step and this comes down to your own senses - trust them. Start with half the béchamel and go from there, it may be perfect as is or could use a little more, you just want to make sure that your sauce isn’t too loose - otherwise it will make a mess when assembling your manicotti.
You can make your bolognese well in advance of making the manicotti - 2, heck.. Even 3 days in the fridge is totally fine! They say flavours develop even more with sauces/stews etc.. after being left in the fridge for a couple days. I think I once read some science stuff to back that theory up, you be the judge.


Ingredients:
2 cups flour
4 large eggs
2.5 cups milk
Kosher salt, to taste
Butter or cooking spray (for greasing the pan)
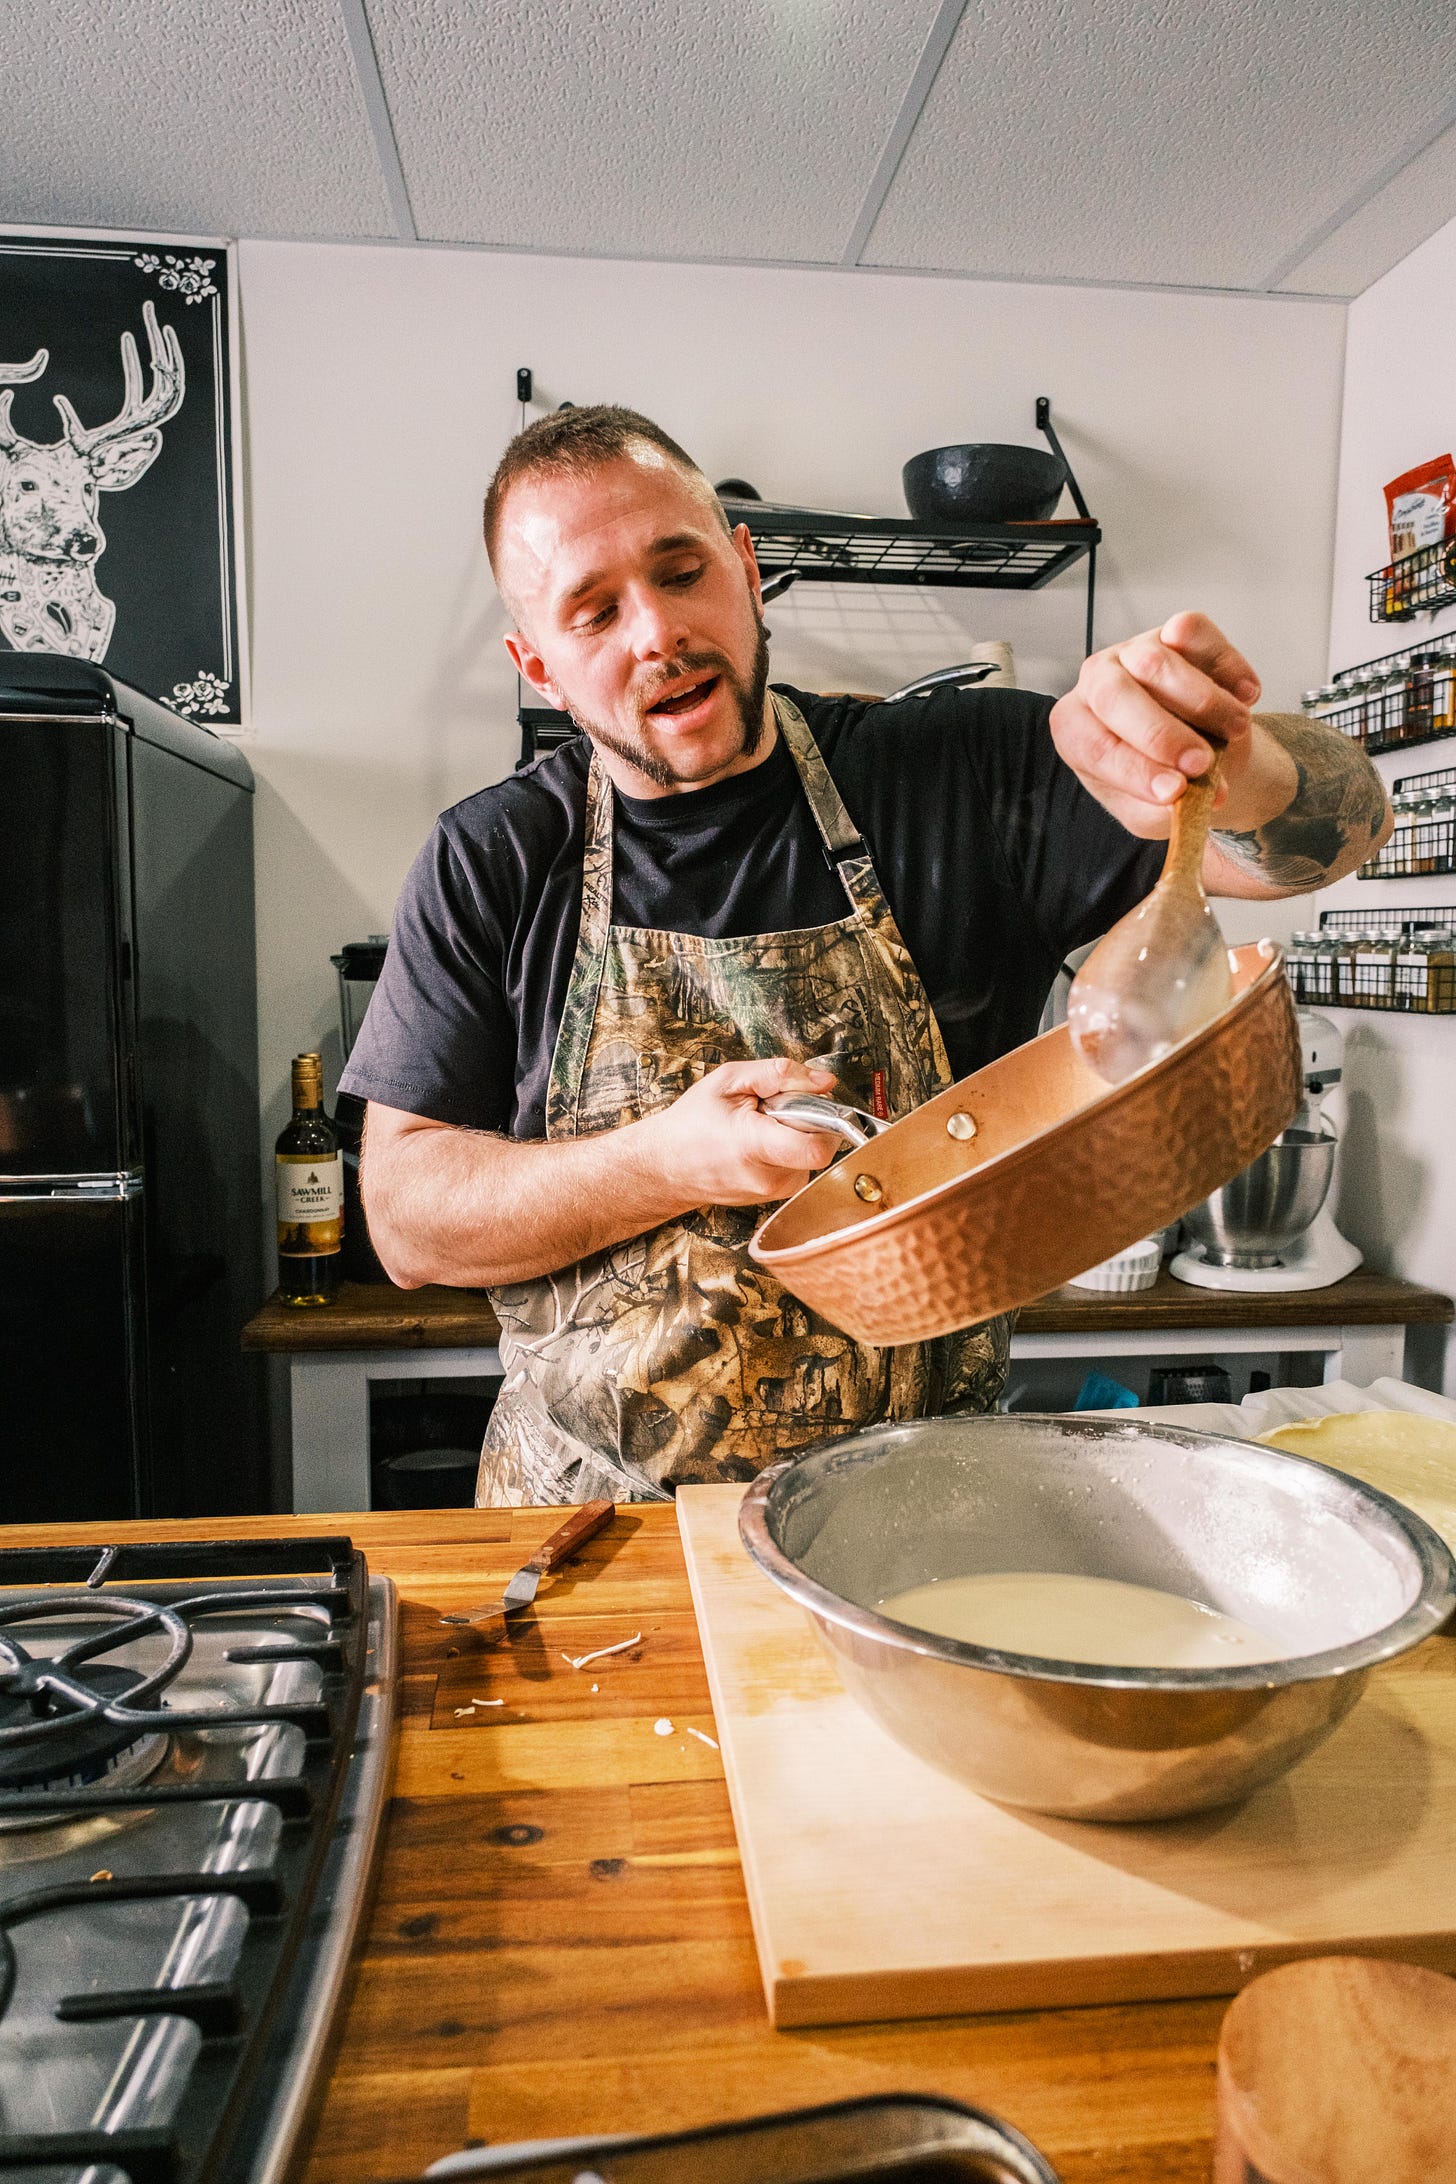
STEP 1: Preparing the Batter -
“Crafting Crepe Batter is Like Painting with Simplicity” - Michelangelo (probably)
Combine the flour, eggs, milk, and a pinch of kosher salt in a blender.
Blend until the mixture is smooth and free of lumps.
Let the batter rest for 30 minutes at room temperature before proceeding.
Notes:
Resting the batter allows the flour to fully hydrate and relax, resulting in tender and pliable crepes.
If the batter seems too thick after resting, add a small splash of milk and blend briefly to adjust consistency.

STEP 2: Heating the Pan -
“A Little Goes a Long Way”
Heat a 12-inch nonstick skillet over medium heat.
Lightly grease the pan with butter or cooking spray.
Notes:
Ensure the pan is evenly heated before adding the batter to prevent uneven cooking.
Use a small amount of butter or spray to avoid greasiness while ensuring the crepes don’t stick.

STEP 3: Cooking the Crepes -
“Spread Thin with No Void”
Pour 2-3 tablespoons of batter into the skillet.
Quickly swirl the batter to cover the entire surface of the pan in a thin, even layer.
If any spots remain uncovered, add a tiny amount of batter to fill them in before it sets.
Cook until the edges of the crepe begin to loosen and the underside is lightly golden (about 1-2 minutes).
Flip the crepe using a spatula and cook for an additional 30 seconds to 1 minute on the other side.


Notes:
Swirling the batter evenly is key to achieving the thin, delicate texture of classic crepes.
Keep an eye on the heat—adjust as needed to avoid burning the crepes.
STEP 4: Serving and Storing -
“Stack Attack”
Remove the cooked crepe and place it on a dinner plate.
Repeat the process with the remaining batter, stacking the crepes on top of each other.
Notes:
Cover the crepes on you put them on a plate with a clean kitchen towel to keep them warm and to prevent them from drying out.
Crepes can also be made a day in advance, just make sure to wrap them tightly in plastic wrap to prevent them from drying out in the fridge. When getting ready to assemble, bring the crepes to room temperature so that they aren’t as delicate.


Béchamel is a traditional, rich and luxurious cream sauce, known as one of the 5 mother sauces of French cuisine. It’s simple, yet complex, as it’s supported by the beautiful aromatics of onion, bay leaf and nutmeg that give it its distinct and beautiful flavour.
Ingredients:
1/2 onion, sliced
2 garlic cloves, crushed
1 bay leaf
4 sprigs of thyme
4 tbsp butter
4 tbsp flour
2 cups milk
1/4 cup grated parmesan
Pinch of nutmeg
Salt and pepper, to taste
STEP 1: Aromatics and Roux Preparation -
“The X Factor”
Melt butter in a saucepan over medium heat.
Add the sliced onion, crushed garlic, bay leaf, and thyme sprigs.
Sweat the aromatics for 2-3 minutes, stirring occasionally, until fragrant.
Stir in the flour to create a roux (/ru:/) and cook for an additional 2 minutes to remove the raw flour taste.
Notes:
Sweating the aromatics in butter infuses the sauce with subtle flavors, enhancing the final result.
Cooking the roux properly ensures a thickened, smooth and lump-free béchamel.
STEP 2: Incorporating the Milk -
“Not So Measured Approach”
Slowly pour in the milk, whisking constantly to prevent lumps.
Once all the milk is incorporated, bring the mixture to a gentle boil.
Continue whisking until the sauce thickens to your desired consistency (see note).
Notes:
Adding the milk gradually while whisking is crucial for a smooth and creamy sauce.
Keep the heat moderate to avoid scorching the milk or roux.
The ideal consistency of the bechamel should coat the back of a wooden spoon evenly. Draw a line horizontally through the middle of the back of the spoon and if the bechamel holds and doesn’t run through the finger line you are looking good! If the consistency to too gluey or thick, add a couple more splashes of milk - it should be thick but run consistently, much like a proper hollandaise sauce.
STEP 3: Straining and Finishing -
“No Strain, No Gain”
Strain the sauce through a fine mesh strainer to remove the onion, garlic, and herb solids.
Stir in the grated parmesan, nutmeg, and season with salt and pepper to taste.
Notes:
Straining ensures a velvety texture, free of any solids or lumps.
Parmesan and nutmeg add depth and richness, but adjust quantities based on personal preference.
STEP 4: Serving and Storage -
“Now or Later”
You can use the béchamel immediately in the recipe, or allow it to cool and store for later use.
To store, transfer the sauce to an airtight container and refrigerate for up to 3 days.
Notes:
When reheating, warm gently over low heat while whisking to restore its smooth texture.


Ingredients:
1x - 28 oz can whole, peeled San Marzano tomatoes
1/2 onion, sliced
2 garlic cloves
Few leaves of fresh basil
2 tbsp olive oil
Pinch of chili flakes
Salt and pepper, to taste
STEP 1: Aromatics Preparation -
“The Art of Doing the Basics Well”
Heat olive oil in a large saucepan over medium heat.
Add the sliced onion, whole garlic cloves, and chili flakes.
Sweat the aromatics for 3-4 minutes, stirring occasionally, until the onion is translucent and fragrant.
Notes:
Use high-quality olive oil to enhance the flavor of the sauce.
Sweating the aromatics allows them to release their flavors without browning, maintaining a balanced taste.
STEP 2: Incorporating Tomatoes -
“Loving Tomatoes Makes You a Better Person”
Add the whole San Marzano tomatoes to the saucepan.
Season with salt and pepper to taste.
Stir gently to combine the ingredients and bring the mixture to a gentle simmer.
Notes:
San Marzano tomatoes are known for their sweet and less acidic profile, making them ideal for sauces.
Season lightly at this stage; you can adjust later after reducing the sauce.
STEP 3: Blending and Reducing -
“More Steps Taken”

Transfer the mixture to a blender or food processor and blend until smooth.

Return the blended sauce to the saucepan.
Add the basil leaves and simmer over medium-low heat, stirring occasionally, until the sauce thickens and most of the water has evaporated.


Notes:
Blending creates a smooth and cohesive texture. If you prefer a chunkier sauce, blend partially or skip blending.
Reducing the sauce concentrates its flavours, so patience is key here.
STEP 4: Final Adjustments and Serving -
“Foresight”
Taste the sauce and adjust seasoning with additional salt, pepper, or chili flakes if needed.
Use immediately in your recipe, or allow the sauce to cool and store for later use.
Notes:
Store in an airtight container in the refrigerator for up to 5 days or freeze for up to 3 months, aka - make much more than you need.

STEP 1: Preparing the Dish -
“You’re Almost There”
Preheat your oven to 425°F.
Take a 9x13-inch casserole dish and spread an even layer of tomato sauce across the bottom to create a flavorful base.
STEP 2: Filling the Crepes -
“Fold n Roll”

Lay a crepe flat on a clean surface.
Place a generous spoonful of bolognese in the center of the crepe.
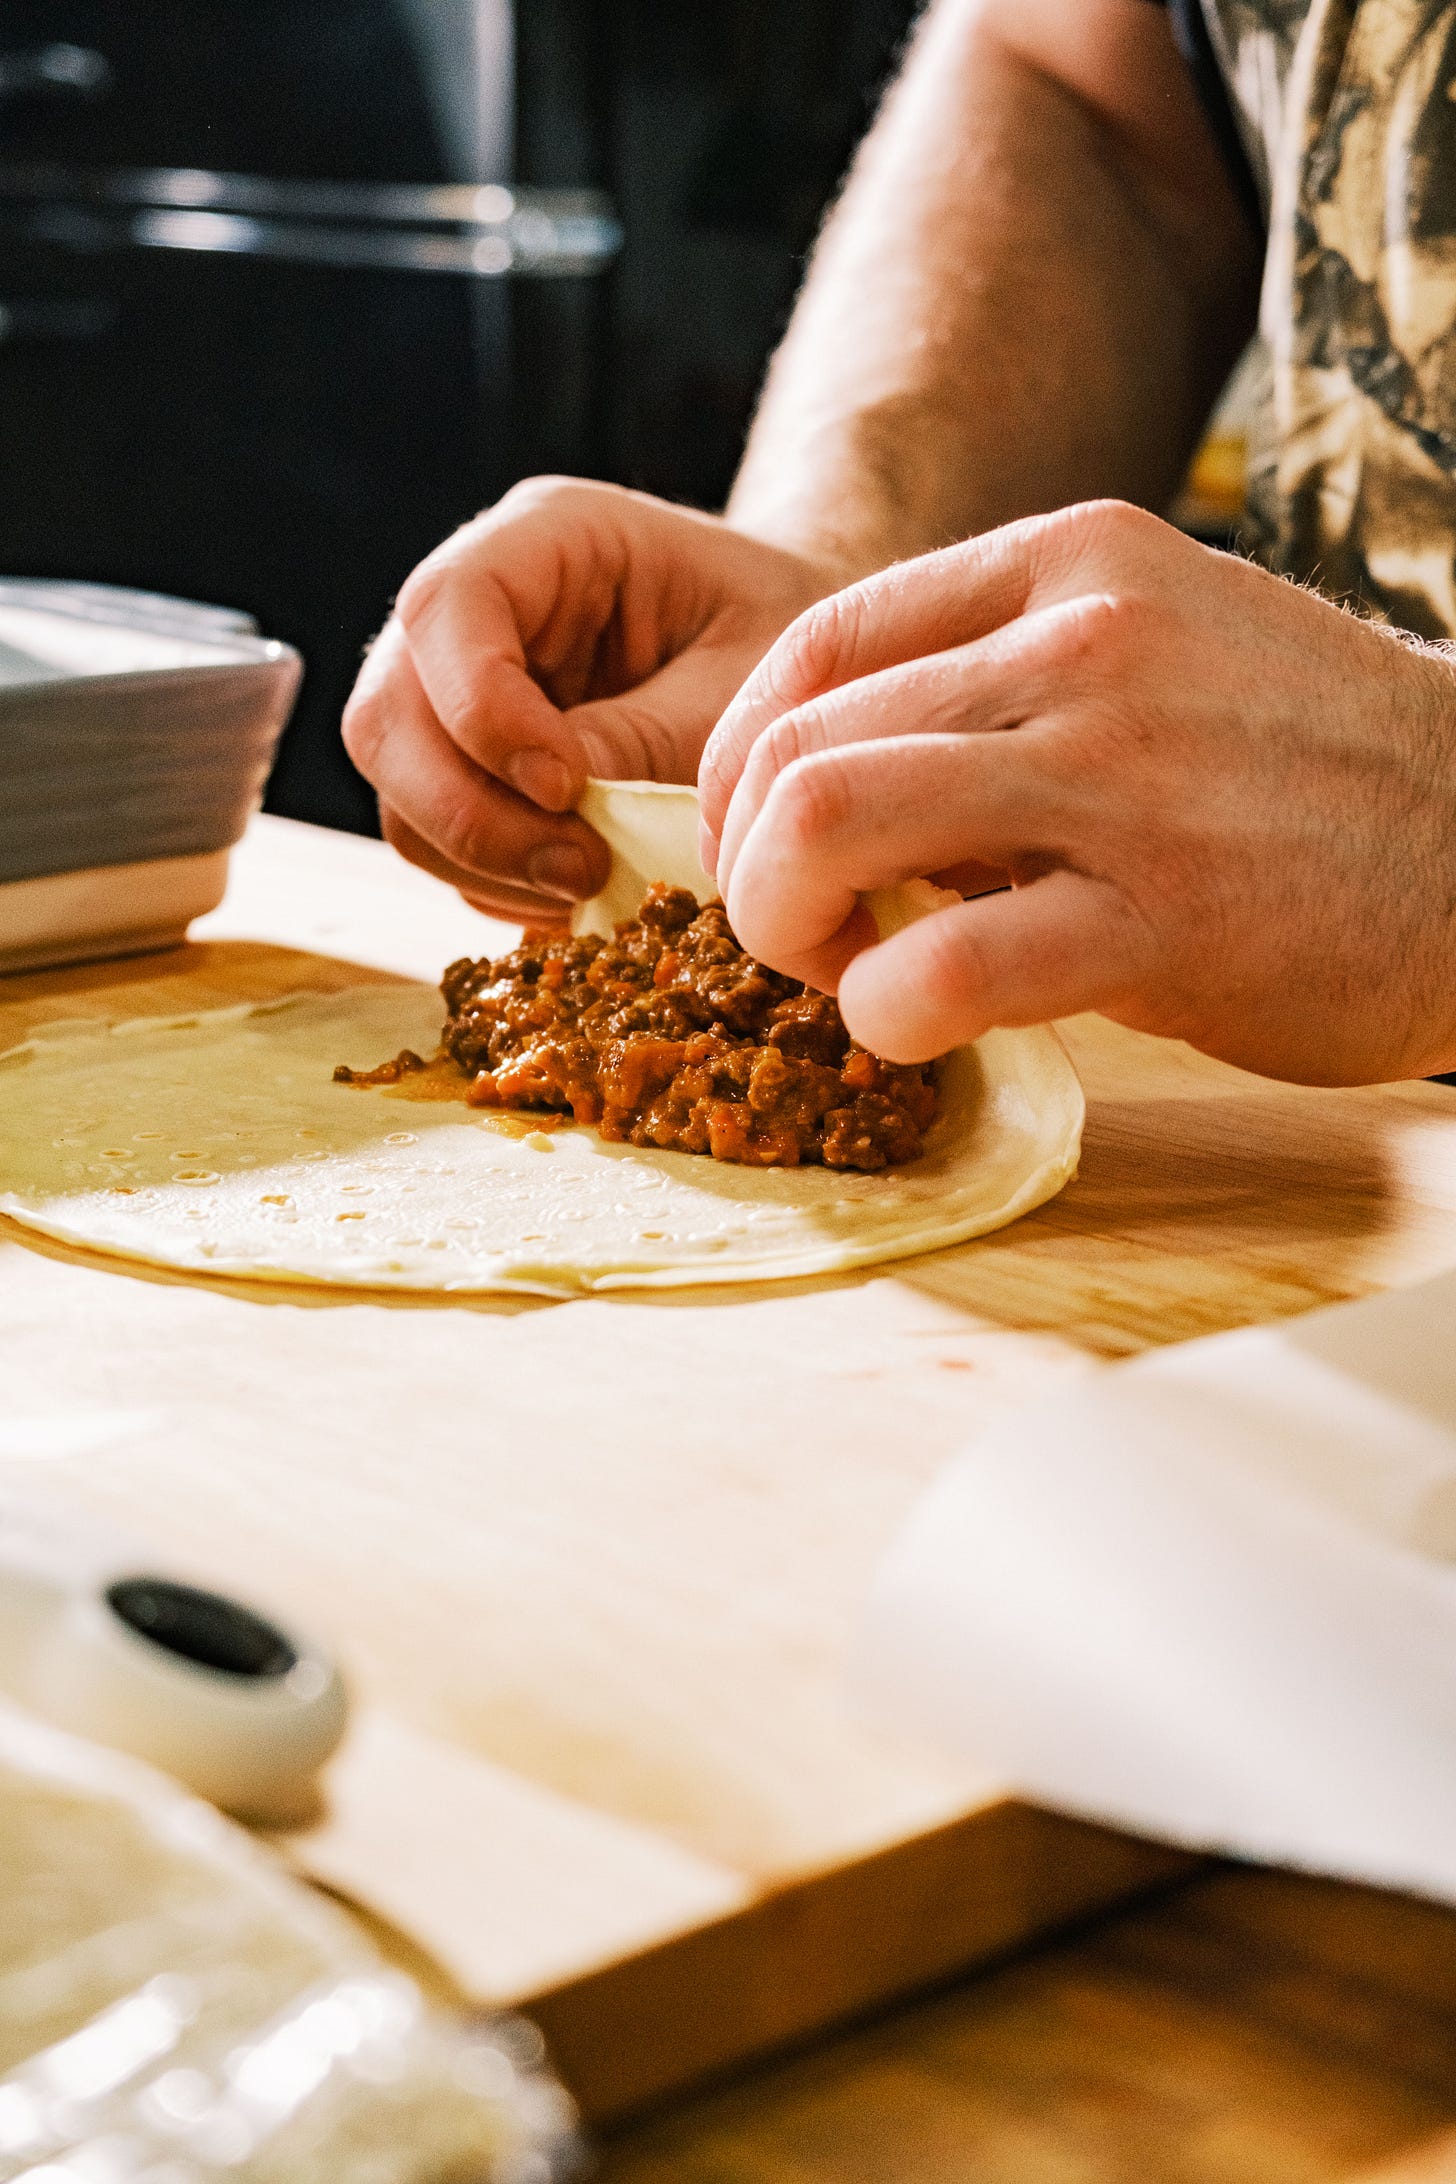
Fold the bottom edge of the crepe over the filling, tuck in the sides, and roll it up into a compact log.


STEP 3: Assembling the Dish -
“The Sum of all Equations”
Arrange the filled crepes seam-side down in the casserole dish, leaving a small gap between each.

Spread the remaining béchamel evenly over the top of the crepes.
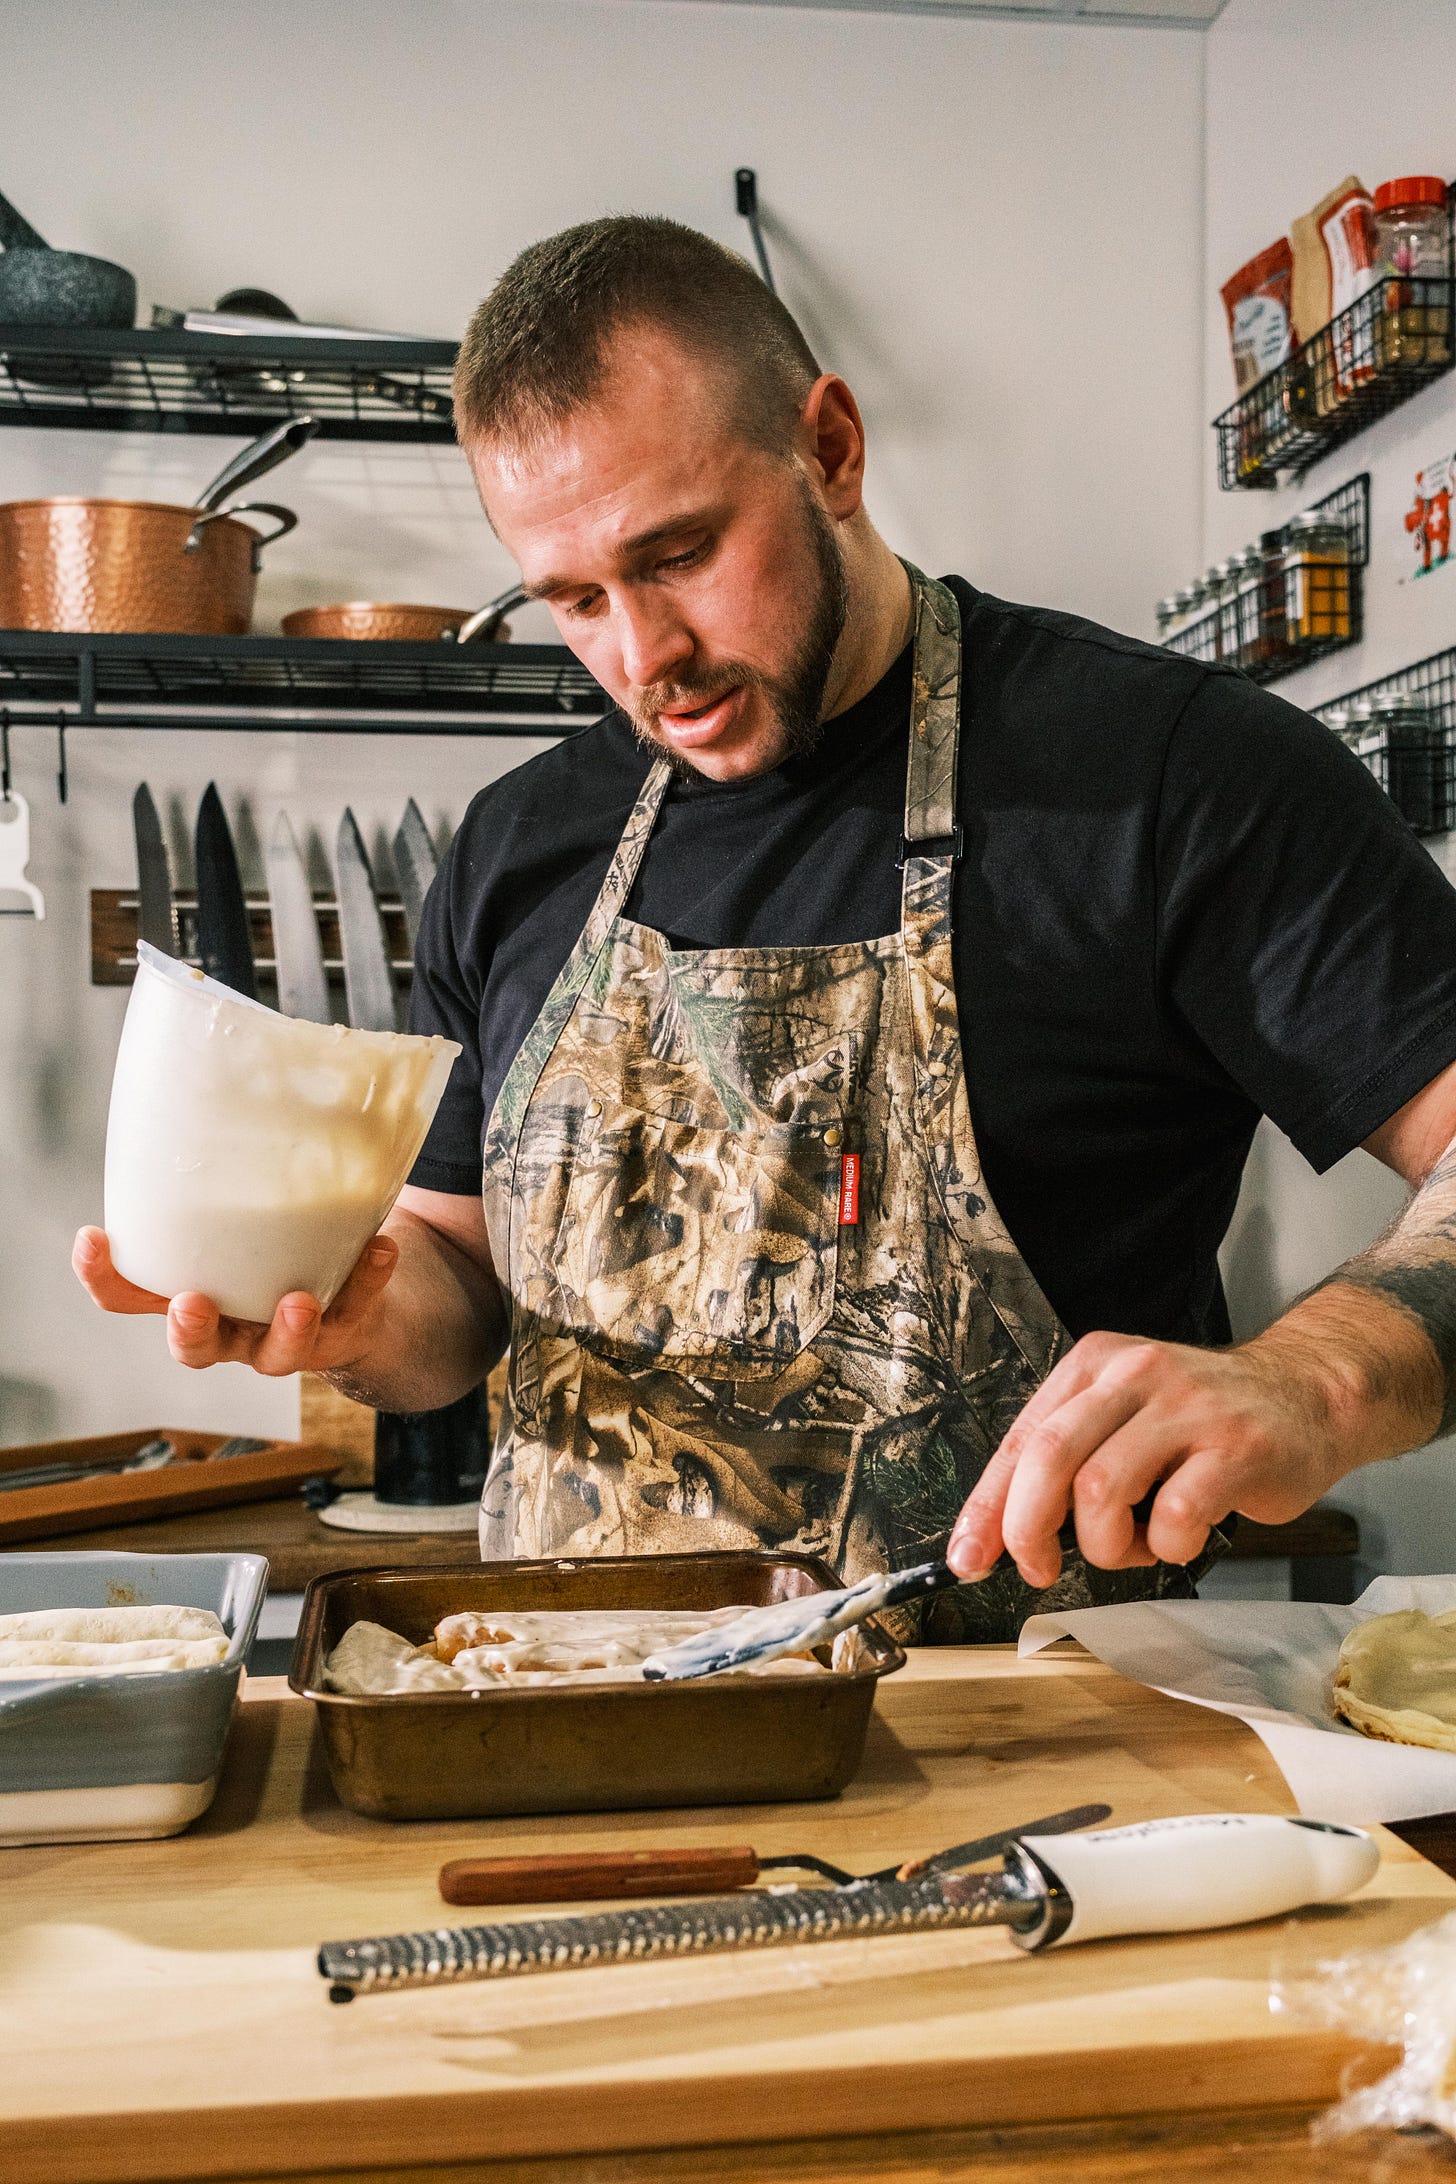
Drizzle any leftover tomato sauce on top and generously sprinkle with grated parmesan.


STEP 4: Baking -
“My Kind of Math”
Place the dish in the preheated oven and bake for about 20 minutes, or until the top is golden brown and bubbling.
Remove from the oven and let cool slightly before serving.


Serve these savoury masterpieces with a crisp green salad, tossed in a light vinaigrette for a perfectly balanced meal. This is the type of dish that you will keep with you for a lifetime - it is perfect in every sense of the word.
The flavours are so memorable, and even though there are a few steps involved it is relatively easy to prepare! This is the type of dish that is acceptable to prepare for nearly any occasion - formal dinner party to potlucks, kids birthday to funeral (yes, I said that).. I trust this dish will bring you as much satisfaction and joy that it’s brought me!
Oh, and don’t forget to take a picture.

